Bridge strike prevention: the UK operator’s practical guide
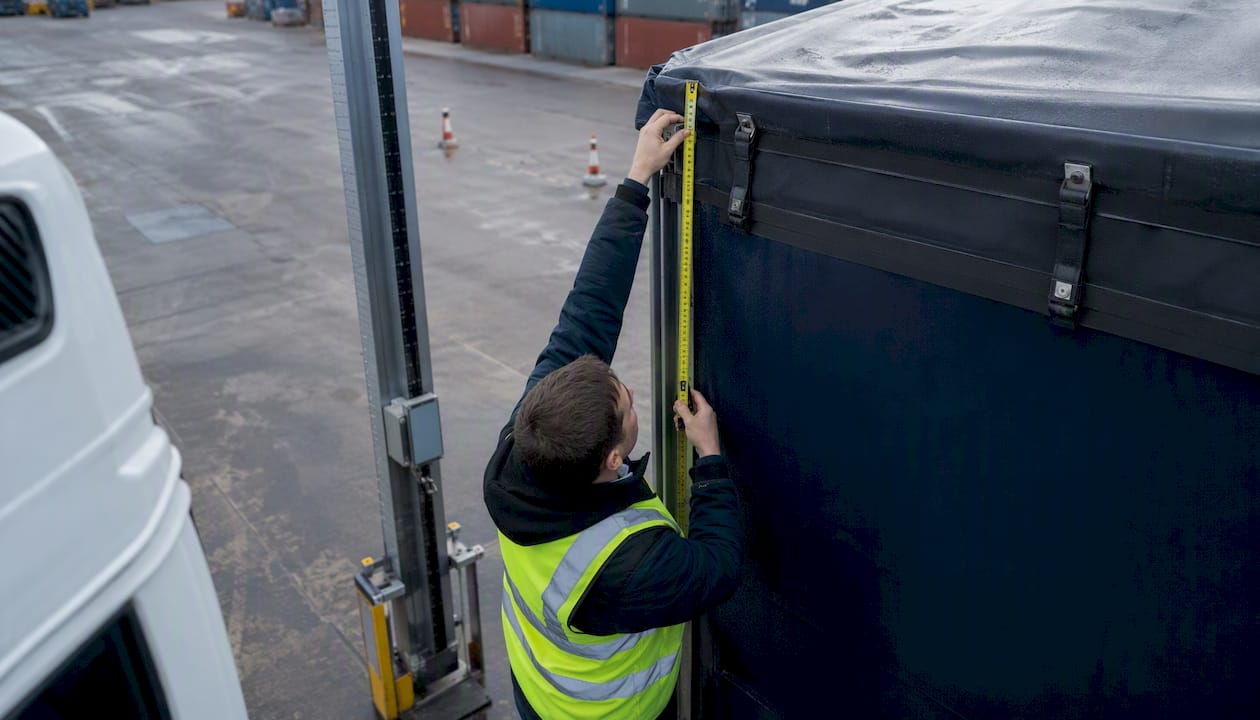
Knowing your vehicle’s full travelling height, planning every route with an LGV-specific satnav, and obeying mandatory height roundels without exception: these three actions account for the majority of preventable bridge strikes on UK roads. The DfT’s professional driver guidance is unambiguous — measure, display, and plan before you move.
Before setting off, confirm each of the following:
- Measure and record the full travelling height (cab + trailer + load + any attachments).
- Display the correct maximum height clearly in the cab.
- Plan the route using an HGV-specific satnav, not a standard consumer device.
- Check the route for low bridges and identify a safe diversion in advance.
- Verify load security and coupler/headboard height; report any discrepancy to your transport manager.
- Carry the bridge identification plate number protocol and emergency contacts.
If a strike is imminent or has just occurred:
- Stop immediately and keep the public away from the vehicle and structure.
- For a railway bridge: use the bridge identification plate to call the rail authority so trains can be halted, then call 999.
- For any other bridge: call 999 first, then notify your employer.
Key takeaways
Consistent pre-journey height measurement, LGV-specific route planning, and structured post-incident reporting are the three controls that reduce bridge strike risk most reliably across UK HGV operations.
| Point | Details |
|---|---|
| Measure and display height | Physically measure full travelling height before every journey and display it in the cab. |
| Use HGV-specific routing | Never rely on a consumer satnav; programme an LGV satnav with your confirmed travelling height. |
| Know the reporting sequence | Railway bridge strikes: call the rail authority via the bridge ID plate first, then 999, then your employer. |
| Understand shared responsibility | Drivers, transport managers, highway authorities, and bridge owners each carry defined duties under the 4Es framework. |
| Jhaulage reduces route risk | GPS-tracked container haulage with confirmed HGV route plans and 24/7 operational support across major UK ports. |
Table of Contents
- Pre-journey vehicle and load checks every HGV driver must carry out
- Route planning and navigation: how to avoid low bridges before you depart
- On-route behaviour: reading height signs and approaching arch bridges safely
- What to do immediately after a bridge strike occurs
- Who is responsible: transport managers, highway authorities, and the 4Es framework
- Operational checklist for container hauliers and fleet operators
- Why embedding these checks into daily operations protects your business
- Tracked container haulage that reduces your route risk
- Sources
Pre-journey vehicle and load checks every HGV driver must carry out
Accurate height measurement is the single most controllable variable in preventing bridge accidents. The DfT good practice guide requires drivers to measure the full travelling height of the vehicle as configured for that specific journey, including the cab, trailer body, load, headboard, and any fitted equipment such as refrigeration units or curtain rails.
Do not rely solely on the headboard figure. Coupler heights vary between vehicles and trailer combinations, so the headboard marking may not reflect the actual travelling height. Measure physically using a tape or laser measure, and if the measured height differs from the headboard, report it to your transport manager before departure. Driver compliance obligations place this responsibility squarely on the operator, not on a statutory height limit: there is no UK legislation setting a maximum vehicle height for public roads, but there is an offence if a vehicle travelling over 3 metres does not display the correct maximum height in the cab.
Pro Tip: Photograph the measuring process and the cab display as part of your daily check. A time-stamped image takes seconds and provides defensible evidence in the event of a dispute or incident investigation.
| Check item | Action required | Record |
|---|---|---|
| Cab height | Measure with tape/laser | Note in metres to two decimal places |
| Trailer body height | Measure with tape/laser | Note in metres to two decimal places |
| Load height above trailer | Measure if load extends above body | Add to trailer figure |
| Attachments (fridge unit, rails) | Measure and add to total | Confirm total travelling height |
| Headboard figure | Compare with measured total | Report discrepancy to transport manager |
| Height displayed in cab | Confirm matches measured total | Sign off on daily check sheet |
| Load security | Check straps, sheets, twist locks | Signed confirmation |
Store completed check sheets digitally or in a physical log retained for at least 12 months. A signed, dated record is your primary defence in any Traffic Commissioner investigation or insurance dispute.
Route planning and navigation: how to avoid low bridges before you depart
Standard consumer satnavs do not reliably route HGVs away from low bridges. The DfT guidance is explicit: drivers must use an LGV- or HGV-specific satnav programmed with the vehicle’s actual travelling height, not a car navigation device.
Recommended routing steps:
- Programme your HGV satnav with the confirmed travelling height before departure.
- Cross-reference the planned route against Network Rail’s low-bridge dataset, which covers over 5,000 structures including those struck since 2000. Note that Network Rail disclaims liability for conflicts with highway authority signage, so treat the dataset as a cross-check, not a definitive clearance.
- Check local authority and Highways England/Transport for Wales/Transport Scotland signage data for the specific corridor.
- Identify at least one pre-planned diversion for each low-bridge point on the route.
- Confirm the diversion is also suitable for your vehicle’s height and weight.
- Brief the driver on the planned route and any known restrictions before dispatch.
If you are diverted en route by roadworks, an incident, or a police instruction, stop at the first safe location and contact your transport manager before proceeding. Never take an unplanned short cut to recover time: container delivery scheduling that builds in contingency time removes the pressure that drives poor routing decisions.
- Port appointment systems at Felixstowe, Tilbury, Southampton, and Liverpool create fixed time windows; a missed slot rarely justifies a route deviation through an unverified corridor.
- GPS-tracked vehicles allow the transport manager to monitor adherence to the planned route in real time and intervene before a driver reaches a restricted structure.
On-route behaviour: reading height signs and approaching arch bridges safely
A mandatory height restriction sign is a red circle containing a height figure in metres. Passing under a structure displaying this sign when your vehicle exceeds the stated height is a criminal offence, not a civil matter. A warning triangle showing a height figure is advisory: it alerts you to a restriction ahead so you can assess and, if necessary, divert. Confusing the two is a common and costly error.
Decision flow when you see a height restriction sign:
- Slow down and read the sign clearly before you are committed to the approach.
- Compare the signed height with your displayed travelling height.
- If your vehicle is at or below the restriction: proceed with caution.
- If your vehicle exceeds the restriction: stop before the structure, do not attempt to pass, and use your planned diversion.
- If you are unsure: stop. A brief delay is recoverable; a strike is not.
Arch bridges require additional care. The signed clearance height typically applies to a central width of 3 metres; clearance reduces progressively towards the kerbs. Drivers of wide loads or vehicles close to the signed height must take the centre line of the road when it is safe to do so, using indicators and, where appropriate, a brief horn signal to warn oncoming traffic. The DfT guidance on arch bridge clearance is clear that kerb-side clearance can be substantially less than the signed figure.
Goal posts (height restriction frames positioned before a low bridge) are a physical warning system, not a guarantee of clearance. If your vehicle contacts a goal post, treat it as a near-miss and stop.
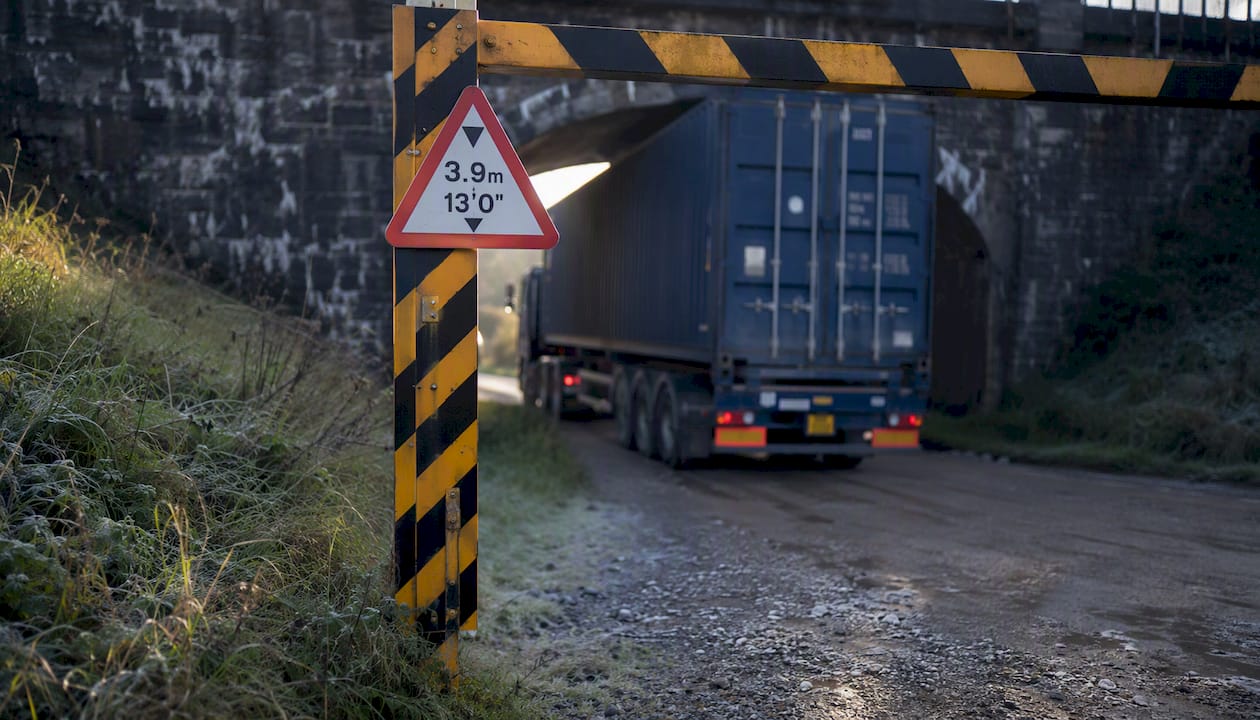
Pro Tip: When moving to the centre of the road at an arch bridge, use dipped headlights in addition to your indicators. In poor visibility or on a blind approach, headlights give oncoming drivers the earliest possible warning of your position.
What to do immediately after a bridge strike occurs
Speed and sequence matter. The wrong order of actions after a railway bridge strike can leave a train approaching a damaged structure with no warning.
Railway bridge strike sequence:
- Stop the vehicle and do not move it until instructed by the emergency services.
- Keep members of the public away from the vehicle and the structure.
- Locate the bridge identification plate (fixed to the structure) and call the rail authority’s emergency number immediately. This triggers a train stop order on the affected line.
- Call 999 and report the incident to the police.
- Notify your employer or transport manager.
- Begin evidence collection (see below).
Other bridge strike sequence (road bridge, canal bridge, or similar):
- Stop and secure the vehicle.
- Keep the public away from the area.
- Call 999 first.
- Notify your employer.
- Collect evidence.
Evidence collection:
- Photograph the point of impact on both the vehicle and the structure from multiple angles.
- Record the bridge identification plate number and location.
- Note the time, date, weather conditions, and any witnesses.
- Preserve in-cab data: GPS logs, tachograph records, and any height warning system alerts.
- Do not attempt repairs or move the vehicle without police or employer authorisation.
The legal and financial consequences of a bridge strike are substantial. Drivers and operators face prosecution under the Road Traffic Act, potential licence review by the Traffic Commissioners for Great Britain, and liability for structural repair costs that can run to tens of thousands of pounds. Insurance premiums typically increase following a claim, and repeat incidents can trigger a public inquiry into the operator’s licence.
Who is responsible: transport managers, highway authorities, and the 4Es framework
No single party owns bridge strike prevention. The Network Rail ‘Wise-up, Size-up’ campaign and the DfT/Network Rail Bridge Strike Protocol both frame the problem as a shared responsibility requiring co-ordinated action across four domains, known as the 4Es:
- Education: Driver CPC modules, operator briefings, and campaigns such as ‘Wise-up, Size-up’ that embed height awareness into daily practice.
- Engineering: Physical countermeasures including goal posts, sacrificial beams, and active detection systems such as laser sensors and variable message signs (VMS).
- Enablement: Consistent advance signing, accurate datasets, and LGV routing tools that make the right choice the easy choice.
- Enforcement: Traffic Commissioner oversight, police action, and operator licence conditions that create accountability.
Research from the National Academies supports this multi-layered approach, recommending a combination of passive signage, physical sacrificial systems, and active vehicle-detection technology as the most cost-effective countermeasure strategy for high-risk sites.
| Party | Primary responsibilities |
|---|---|
| Driver | Measure height, display correctly, plan route, obey signs, report strikes |
| Transport manager | Verify checks, approve route plans, maintain records, brief drivers |
| Highway authority | Inspect and risk-rank bridges, install advance signing, report to Bridge Strike Prevention Group |
| Bridge owner | Maintain structure, install goal posts and detection systems, co-ordinate with highway authority |
| Network Rail / RSSB | Publish datasets, run 4Es campaigns, co-ordinate with operators and highway managers |
Highway authorities should use a consistent risk-ranking scoring sheet that weighs strike frequency, sign failure probability, and consequence severity, then implement signing improvements in priority order. The Protocol recommends six-monthly progress reporting to a Bridge Strike Prevention Group. RSSB publishes supporting research and standards that inform this process.
Driver CPC periodic training is the most practical vehicle for embedding bridge strike competence across a fleet. Refresher briefings focused specifically on height measurement and route planning should be conducted at least annually, with practical route briefings whenever a driver is assigned a new corridor or an unfamiliar vehicle configuration.
Operational checklist for container hauliers and fleet operators
Container haulage introduces specific variables: swap bodies, skeletal trailers, and refrigerated units all affect travelling height differently, and port diversions at Felixstowe or Tilbury can push drivers onto unplanned routes at short notice. The following checklist reflects the fleet management practices that reduce incident risk in port-to-door operations.
Daily dispatch checklist:
- Confirm travelling height for the specific vehicle and trailer combination in use that day.
- Verify the route plan is loaded on an HGV satnav programmed with the confirmed height.
- Check port appointment time and identify the approved diversion route if the primary is blocked.
- Confirm escalation contacts (transport manager, port operations desk) are saved in the driver’s phone.
- Sign and date the pre-journey check sheet; transport manager countersigns before departure.
| Fleet management control | Frequency | Owner |
|---|---|---|
| Pre-journey height check and cab display | Every journey | Driver + transport manager |
| GPS route adherence monitoring | Real-time | Transport manager / dispatch |
| Driver refresher briefing (bridge awareness) | Annually minimum | Transport manager |
| Vehicle height audit (all trailer combinations) | Quarterly | Fleet manager |
| Incident log review | Monthly | Transport manager |
At major ports, appointment system protocols reduce the pressure to take unverified short cuts. When a slot is missed due to congestion or delay, the correct response is to rebook through the Vehicle Booking System, not to divert through an unchecked corridor. Store all check sheets and GPS logs digitally, with a minimum 12-month retention, to support any Traffic Commissioner audit or insurance investigation.
Why embedding these checks into daily operations protects your business
The operators who treat bridge strike prevention as a compliance tick-box rather than an operational discipline tend to discover the true cost only after an incident. Recovery alone, excluding structural repair liability, can immobilise a vehicle for days. The reputational damage with a freight forwarding client whose cargo is delayed or damaged is harder to quantify but equally real.
From an operations management perspective, the near-miss reduction that follows consistent pre-journey checks is measurable within a single quarter. Drivers who know their height and have a confirmed route plan make faster, more confident decisions at the roadside. That confidence reduces hesitation at arch bridges and signed restrictions, which in turn reduces the risk of a secondary incident caused by an abrupt stop in a live traffic lane.
Practical benefits of embedding the checklist into daily dispatch:
- Fewer unplanned delays caused by route diversions discovered en route.
- Lower insurance exposure and a stronger position in any claims negotiation.
- Cleaner Traffic Commissioner compliance records, supporting licence renewal.
- Reduced driver anxiety and fewer disciplinary actions arising from avoidable incidents.
The checklist is not a burden. It takes under five minutes per journey and costs nothing to implement beyond a printed or digital pro-forma. The cost of not doing it is orders of magnitude higher.
Tracked container haulage that reduces your route risk
Specialist container haulage with GPS tracking shifts a significant portion of route risk management from the individual driver to an experienced operations team. Jhaulage operates a fleet of over 40 GPS-tracked trucks and trailers across major UK ports including Felixstowe, Tilbury, Southampton, and Liverpool, with route planning and real-time monitoring built into every movement. Every vehicle is dispatched with a confirmed, HGV-appropriate route plan, and the operations desk monitors adherence throughout the journey.
If you are evaluating a container haulage provider, ask three questions: Does the provider use HGV-specific routing for every movement? Does GPS tracking allow real-time route monitoring and intervention? What is the incident reporting protocol if a strike or near-miss occurs? Jhaulage answers all three with documented procedures and 24/7 operational support.
To discuss your container movement requirements or request a quote, visit Jhaulage’s container haulage service page.
Sources
The following official sources should be kept to hand by every transport manager and fleet operator:
- Prevention of bridge strikes - A good practice guide for professional drivers
- Prevention of bridge strikes (Network Rail)
- Prevention and Mitigation of Bridge and Tunnel Strikes (National Academies)
Embed the DfT pro-forma into your fleet’s daily dispatch procedure and review it against your Driver CPC training schedule at least once per year.